-
Free delivery from £70 for the United Kingdom | Same-day shipping on orders placed before 1pm*
-
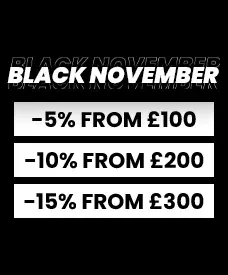
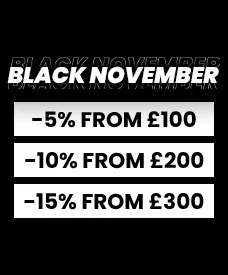
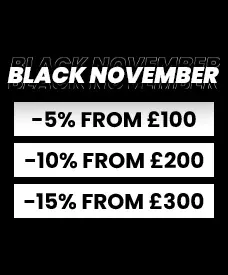
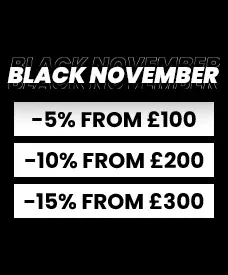
Black November: 5% off from £100, 10% off from £200 and 15% off from £300 on the entire store until 9 november (Excluding discounted products, Therm-A-Rest, MSR, Stoots, Big Agnes, Santa Madre & Nemo)
How to Organise Your Backpack for a Long-Distance Hike?
Tackling a long-distance trail like the GR®20 over several days in self-sufficiency means carrying all the gear you’ll need. This includes a shelter, sleeping system, water, and food at the very least. Additionally, you’ll want to pack clothing, a stove and cookware, a hygiene kit, a well-stocked first-aid kit, and more.
Carrying all this equipment requires optimizing the organization and packing of your backpack to avoid straining your back as you hike. The goal is to make carrying your pack as comfortable and adapted as possible to your body type and level of experience, ensuring you don’t end up disheartened or, worse, injured. Here are some tips for properly organizing your backpack.
Weight Distribution and Common Sense
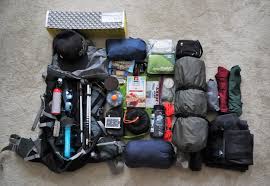
A backpack designed for long-distance hiking will have a larger capacity than one used for day trips or weekend hikes. It’s recommended to choose a model with a waist belt in addition to shoulder straps. The waist belt helps distribute the weight between your shoulders and hips.
The key to packing is to distribute weight in a way that maximizes the use of the pack’s load-bearing straps. The general rule is simple: heavy items should neither be at the bottom nor the top of the backpack but as close to your back as possible. This prevents the weight from pulling you downward or backward, reducing the strain on your balance and improving comfort on the trail. This is especially crucial for mountain hikes with frequent ascents and descents. Proper weight distribution also minimizes the risk of back pain.
Additionally, avoid placing hard or sharp-edged objects directly against your back for obvious comfort and safety reasons.
An Example of Optimal Packing
Start by placing your sleeping bag horizontally at the bottom of your backpack, either in a compression sack or loose if you're aiming to save weight. Next, add your sleeping pad and pillow. While a pillow might seem unnecessary, it's an essential comfort item for many. Together, these items should reach at least the level of the waist belt.
If you use a hydration bladder like a Camelbak or Hydrapak, this is the time to insert it, filled, against your back. Many backpacks include a dedicated compartment for hydration systems. If not, the bladder can still be placed close to your back. Since water is relatively heavy, keeping it near your back will act as a cushion and stabilize the weight.
Strategic Food Placement
Your freeze dried meals should be packed in the middle section of your backpack, easily accessible but not adding unnecessary bulk against your back. Group meals by day and keep frequently accessed items like snacks and energy foods in external pockets or the top compartment. The compact nature of freeze-dried packaging makes them perfect for filling gaps between other gear without creating uncomfortable pressure points.
Store your cooking stove and fuel separately from food items for safety, typically in side pockets or the top compartment where they're easily accessible when you need to prepare your meals.
Personally, I use a 4L Sea to Summit Watercell reservoir. It's not a hydration bladder with a tube but rather a robust reservoir. Besides being durable, it doubles as a shower or tap for washing, such as cleaning your hands before cooking. This dual functionality is especially handy when preparing freeze-dried meals, as proper hygiene becomes crucial when handling food and cooking equipment during extended backcountry adventures.
How to Use the Remaining Space?
Next, still cushioned by clothing, I add a first-aid kit for small injuries, a hygiene kit, and possibly an electronics kit (rechargeable battery, cables, camera/video gear, etc.). I may also include a stuff sack with evening clothes (as a true Breton, I’m always wary of rain). Finally, at the very top of the backpack for easy access, I place my waterproof jacket.
Once everything is packed, I tighten the compression straps to reduce bulk, and that’s it
What About Exterior, Top, and Side Pockets?
Here, the keyword is accessibility! In general, I store a water filter in the side pockets. I alternate between several models from different brands: Katadyn BeFree, Grayl UltraPress, and more recently the Öko 1L. As mentioned earlier, these pockets are also used to store tent poles and stakes or even a camping chair.
In the top pocket, I place a snack or two, sunglasses, a cap or hat, a headlamp, a spork, my compass, and an IGN map—in short, all my small essentials. If the waist belt has pockets, I use them to store my phone and keychain
In Conclusion
To avoid unnecessary noise, I recommend not attaching carabiners to hang gear that will constantly clank against your backpack. The only thing I attach to my pack is my trekking poles. Of course, all of this is subjective, based on my personal experiences and preferences. I encourage you to test different setups to find what works best for you and refine your choices as you gain experience.
Also, don’t hesitate to write a gear checklist. After your hike, check off what you used and didn’t use to streamline your load for future trips.
Yves JEAN
A Word About Lyophilise & Co 🌶
Based in Lorient, Lyophilise & Co is the go-to reference for freeze-dried meals and high-quality outdoor gear. Whether you're a hiker, skipper, trail runner, bushcraft enthusiast, or bivouac lover, we offer a wide range of technical products tailored to all your adventures. With over 2,000 items available, we support your expeditions in France and abroad.
If you have any questions, our experts are here to help and will gladly assist you:
☎ +33 (0)2 97 87 23 73
✉ team[at]lyophilise.com
We also have a showroom open Monday to Friday:
📍 6 bis rue du Sous-Marin Vénus, 56100 Lorient, France
Related posts
-
Partnership with Secouristes Sans Frontières
Freezedried & Co and Secouristes Sans Frontières create an evacuation bag.Read more -
Marathon des Sables: List of Mandatory Equipment
Below is the list of mandatory equipment (applicable for each MDS event in Morocco, Peru, or Fuerteventura)Read more -
Hydration in Hiking: How Much and What to Drink?
2024-11-15Discover the importance of proper hydration during your hikes, with advice on what and how much to drink, as well as...Read more -
Self-Heating Systems - Heat Without Fire, Now Possible!
A comprehensive guide to self-heating systems that allow you to warm up a meal or drink wherever you are, ensuring a...Read more -
Water Treatment by Katadyn
Published in: Equipment2024-11-21Katadyn offers a wide range of water filtration solutions, including water filters that use different filtration...Read more